Showing posts with label christmas tree. Show all posts

Sock Garland Advent Calendar

As followers of this blog will already know, recently I was gifted with a beautiful, old Singer machine from my boyfriends grand aunt. I was super excited as so many crafting techniques and projects require sewing and I just don't have the time or patience to do it all by hand! However, my first attempt at using it didn't go too well. It ended with me crying on the bed while my boyfriend used a screwdriver to remove a clump of thread from the inside. I was defeated and scared and the beautiful old sewing machine was put back in it's case.

Luckily, it kept shouting from the end of the bed to be used and my favourite craft magazine, Homemaker Magazine, came with an easy sewing project for beginners that month so I plucked up the courage to try again. This time, the thread clumped again but I fixed it, read a bit more of my user booklet, adjusted the tension on the machine and away I went! I finished my first sewing project on my own machine! Huzzah! 


I was so happy that I immediately hopped onto Pinterest to see what my next project could be and then it hit me. An advent calendar. The one I made two years ago didn't have big enough pockets to hold the sweets and that really annoyed me so I decided a new advent calendar would be the best project. There were so many ideas to choose from but I loved all the garland based ones so much that I decided to do one in that style.

So out came the old Christmas tea towels (4 to be exact about it!)...


Out came some sock drawing skills, which I didn't know I had, to make my template. I first drew it on paper, added a 1cm border as  a seam allowance and cut it out. Then I glued it to some cardboard and cut it out to have a firm template to use on the tea towels. 


I then drew around the template 12 times on each tea towel making sure to turn the template every second time. This ensures that once all the socks are cut out, each pair will have the right side of the tea towel facing out when pinned together.


Once all the socks were cut out I had 48 single socks pinned into 24 pairs. Then it was time to sew.  Originally I was going to sew them on the wrong side and then turn them out but when I had them all cut I liked their size as they were so I decided to sew on the right side instead. Scarily, on my first sock, this happened...


But I just took a breath, ripped it out, adjusted my tension (as I learned previously!) and off I went. In no time I had 24 beautifully sewn socks. Thanks to the boyfriend I also, and a beautifully new pair of pinking shears so I used them to trim the edges. And yes my sewing wasn't perfect, so many of the borders became smaller than the others post pinking resulting in various sized socks but that's the joy of homemade right? Right guys?! .... Right?


I was then ready to hang my garland. I had bought some lovely red twine which I weaved in and out of the bannister on my stairs and then tied it in place. I had also bought the adorable pegs below - I know, for shame, I should have made them too but one step at a time guys!


I then pegged each sock to the twine, popped in the sweets and my beautiful advent calendar sock garland extravaganza was complete!


I can't express how happy I am with the finished result. I can't stop looking at it and smiling. Seriously, if you haven't made anything for your home for this Christmas yet do it now! I can't tell you how wonderful it feels to have something you made yourself hanging up and looking so beautiful.  I think I might finish this project crying on my bed too but this time they will be tears of joy. 

Yes. Crying over tea towel socks. I am still cool. 

Folding Frolics!

As you may have seen on Tiddlybobs already this week, I have been trying my hand at napkin folding and this got me wondering about what other crafts you can make using folding and TAH-DA this weeks Tiddlybits was born!


There are so many wonderful things you can make for your tables using napkins and soooo many tutorials available online in blogs and on YouTube. I loved this tutorial from One Good Thing by Jillee as it's a really sensible idea and can be used for every occasion; you can just theme it by changing what napkins you use! The simple ideas are always the best. 


Another great idea is to create beads from old scraps of paper or magazines that you have about the house. These beads can then be turned into necklaces or bracelets simply by stringing them together. You could even purchase earring clasps and make a unique and beautiful pair of earrings out of them. This tutorial from Cosmo Cricket is really in depth at showing you how the technique works and it's so easy, I'm not sure why I haven't done it before!


As the picture says, this tutorial from Peppermint Creative shows you how to make paper stars by folding (there is also glue involved but we don't mind that here!). It's a really pretty idea and with Christmas coming up it might be a great way to make a star for the top of your tree. 


Speaking of Christmas, how gorgeous are these folded Christmas trees? In this great tutorial from  The House that Lars Built these have been sprayed with gold paint and glitter but if you picked paper with a festive pattern, you wouldn't need to get the paint out at all! 


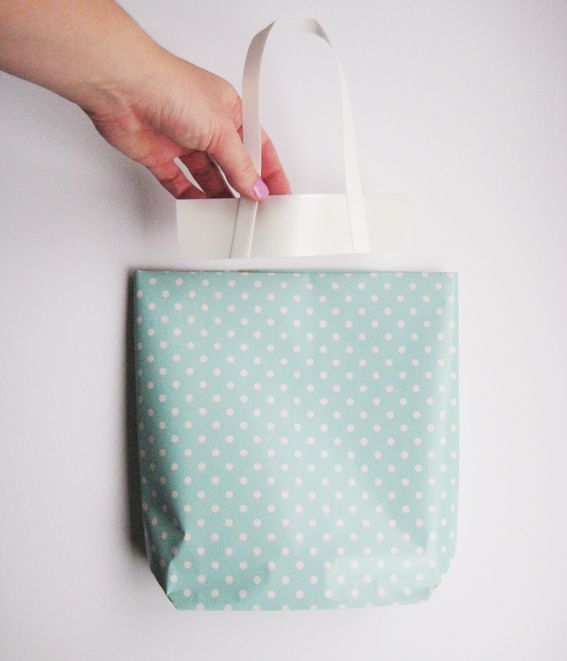
If you're thinking of Christmas and you think like me, then you're thinking of gift bags. This simple tutorial from Hello Sandwich is great for showing you how a bit of folding and some sellotape can create gorgeous gift bags. Don't forget that handles can be made from string and/or ribbon too!


Accordion books are definitely more complicated than just a bit of folding but still they are not impossible to make and are definitely well worth it. This tutorial from Design Sponge is the best I've come across on how to make one. They are a great away to create journals of specific events like your wedding or graduation. They can also be used as memento books. For example you could use it as a travel diary where you can stick photos, ticket stubs, diary entries etc. and you could even decorate the cover with a map of your trip.   

And finally, like last week I am going to end this weeks Tiddlybits with a video tutorial showing you how to wrap your presents in old shirts (or new ones that could form part of the gift!). But all of this  is really only the tip of the iceberg in folding crafts - please visit my Folding Fun Pinterest Board for even more inspiration. 


For the wonderful Annabel

My amazing friend Annabel is currently going through a course of chemotherapy treatment which she is being super brave and open about. She is blogging about her experience and you can read about  it here. She has also asked her friends to complete a serious of challenges to keep her uplifted during the course of this treatment which will last until Christmas. It's such a wonderful idea and I hope it really does help her through this difficult time.

This time the challenge was to create a Christmas themed pom pom so I have created this Christmas tree and I decided to blog about it in true Annabel style.


I followed this tutorial from One Sheepish Girl but as I didn't have pom pom makers I used this hand technique for the bark of the tree and then I used a tin can for the Christmas tree, to get a bigger pom pom. I then cut out gold ribbon to make a star and sewed all the bits together.

Annabel you are an incredible woman and I am with you all the way as you go through this difficult time. Huge love! xxxx