Showing posts with label crafting. Show all posts

Return to Crafting

Hi all you Tiddlybobbers!

Sorry for the long absence but a lot of personal problems have kept me away from blogging for a bit. However, things have now begun to steady out a little so back to my craft desk I go.

I am lucky enough to have incredible friends and a group of them bought me a Hobbycraft gift card for my last birthday. I have spent hours on the site putting things in the basket and taking them back out and putting them back in again but finally I selected my chosen items and my box of awesome craft supplies arrived yesterday. 

Mmmmm... crafty goodness!!!

And it was just in time as today is the rainiest day in a long time so absolutely perfect for many cups of tea and lots of crafting. 


I've made a few projects today. I've become quite self-reflective in the last few months and have begun journalling. A bit part of that has been jotting down all the inspirational quotes I come across.


So I decided to bring this into our house and energize my housemates with an inspirational word on our wall. 


The wooden word is from Hobbycraft and was super cheap. I painted it in a lovely acrylic blue and popped it on the wall with Bluetac so now, as we descend our stairs every morning, we are inspired to do what we do best. 


The wall above my bed is very blank and I've been contemplating what to put on it for ages. I saw another wooden word on the Hobbycraft website and it instantly stimulated a project idea in my head. 


I painted the word in the same blue acrylic paint and then added gold glitter to some wooden pegs. I then hung some string with clear tape and hung up some clouds I had cut from white paper. Voila! A super cute way to brighten up my blank wall.


The final project involved my favourite crafting skill - embroidery. I bought a plain pencil case to keep all of my craft tools (pom pom makers, paper cutting knife etc.) in and brightened it up with some simple stitching and my favourite buttons. 


Feels so good to be making things again and I can't wait to post about more of my creations int he future. Sorry if I bore you to tears!

Crafty fun times!

Well it's been a crafty week this week! First off I had to make some props for a drama club show. Well I didn't have to, I chose to! I facilitate a drama club for 5-6 year olds once a week and at the end of each term we do a little showing for the parents. This term it was all about space so the kids performed a short poem all about the planets in our solar system. 


I printed colouring book sheets of each of the planets from twistednoodle.com and gave them to the kids to colour in. I then took them away, cut them out and using masking tape to attach them to wooden skewers. 


This week I also made my first attempt at paper cutting and made a Secret Garden bookmark. I cut the shape of the keyhole out in white card and stuck it on top of flowery paper to give the illusion of a garden through the keyhole. 


I then stuck more white card on the back and added a purple ribbon. I didn't like the finished product as the keyhole is not as symmetrical as I would have like so I'll use a stencil next time! I also didn't think the paper did what I wanted it to so I'll draw the garden behind next time I think! 

I also finished a project I've been working on since the New Year but I'll tell you more about that one after Easter! 

If the key fits...

Unfortunately this week our house was broken into so a change in locks was necessary. With this brought a new house key but it also left me pondering about what to do with the old key. Leave it in a drawer to get lost forever or is there something more interesting I could do with it?

So off I popped to Pinterest and what an awesome collection of craft project ideas I found including an amazing organisation...


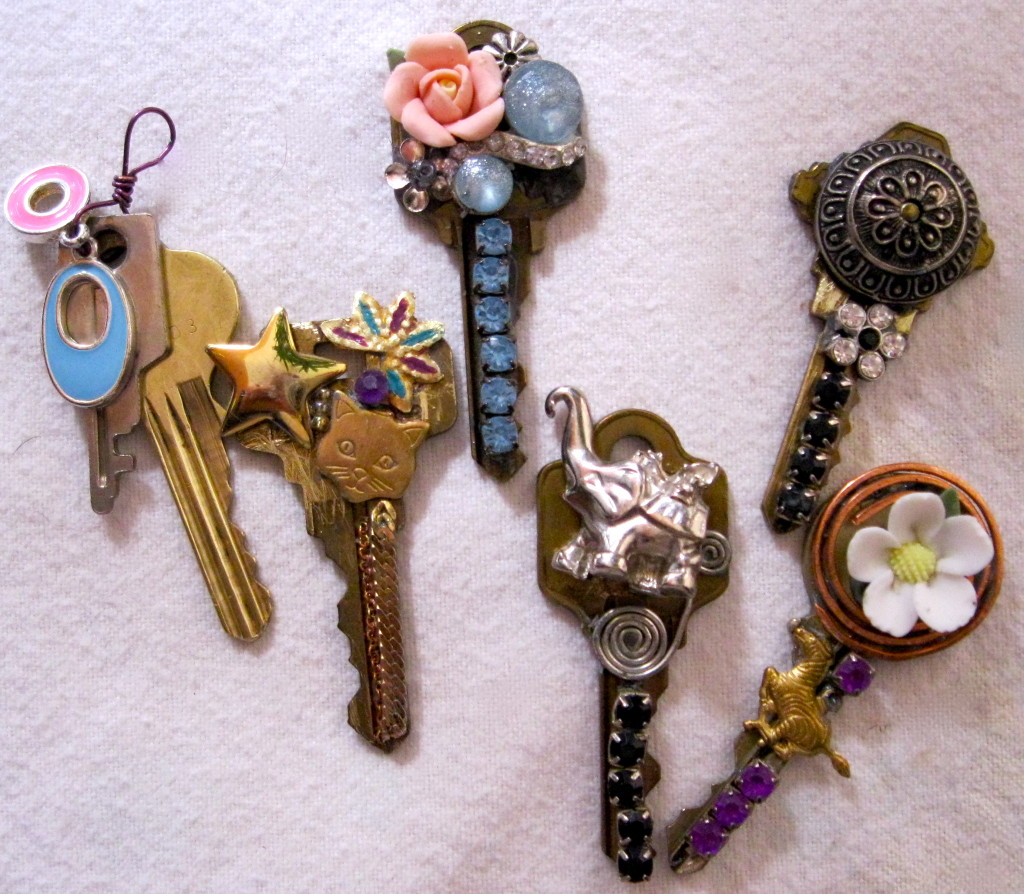
First up and the most common idea is to turn old keys into necklaces, earrings or badges. You just need some old bits and bobs and some glue and a chain to string through the hole in the key. It's super easy but looks very cool.


The pictures above are from the lovely ladies at The Green Divas who take you through making your own jewellery here too so you can never get lost! 


Another popular idea was making windchimes. There are many different styles and types - a few of which are on my Pinterest board. I think it's probably best to let your imagination go wild and work with the materials you have at home to make a really unique piece (and save on cost!) but if you are looking for direction you can find the tutorial for the windchime shown in the picture on the awesome Urban Threads blog.


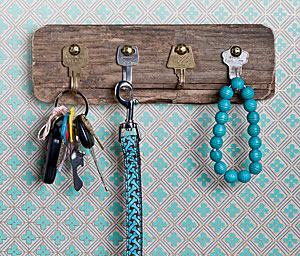
I love this idea from Wendy on Sierra of turning old keys into a key rack as it completes the life cycle of a key perfectly and as we know from The Lion King the circle of life moves us all!! The tutorial is great and can be found in slideshow form here.


The final project is called The Giving Keys. These are repurposed keys with inspirational words carved into them. They are given to a person when it's felt they most need it and the person keeps it until they meet someone else they think needs that word in their lives. It's a beautiful project and it exists to employ those transitioning out of homelessness so it's for a great cause also. I urge you to get involved if you can. 

Pom Pom Bookmark

Ok I know it's pom poms AGAIN so it doesn't count as a new skill.... but I got new pom pom makers and I HAD to use them!


PLUS it is a new project so it counts as new learning! 


It's super easy to make your Pom Pom Bookmark and this great tutorial from Design Mom shows you exactly how to make one. I changed mine up a little bit by making a plaited tail. I simply tied an extra bit of string to the knot in the middle of the pom pom and then plaited all three bits of string together. 

If you don't know how to plait then here's three ways from WikiHow


Looking forward to seeing pictures of all of your pom pom bookmarks!

New Year, New Skills

2015 is going to be all about learning a lot of various new crafting skills, exploring the types of projects that they can lend themselves too and hopefully inspiring you to get crafting!

Today is all about crochet! So far I'm this far along on my first ever granny square.....


It's a bit messy as I'm still getting used to my holding technique so the tension is all over the place but I think it's pretty decent for a first attempt if I do say so myself.


This video tutorial from Bella Coco is the one I followed and it's brilliant. Also don't forget to not be afraid to pause and replay so you can tailor it to your own learning speed. Good luck!

Deck the halls...

CHRISTMAS IS SO CLOSE!!!

Yes I may have already overdosed on sweets and Christmas films but there's still time to craft up some quick decorations before the real fun begins. This weeks Tiddlybits has some great ideas on projects for you to try and don't forget to visit the Pinterest board for lots more. 


First up is this gorgeous wall hanging from 20 North Ora. I'd love to make a wreath for my front door but I have no idea where to find the greenery and I can't afford the greenery or afford the base they need to go on so this wall hanging offers an awesome alternative. 


I tried this idea myself last year and I love it. It's such a great and easy way to add Christmas cheer to doors and cupboards. However, last year I didn't add a gift tag and think it's a brilliant idea so thanks to Liz on Call for that one! 


So, if like me, you've started the Christmas celebrations already, you may have some wine corks lying around the house. Instead of dumping them, why not turn them into colourful Christmas decorations that you can from year to year? This tutorial from Joy's Life is awesome and more importantly easy to do and for those of you with children, it's one that they can get involved with too. You could also use glue to sprinkle them with glitter too! 


And if, you've got wine corks then you must have wine bottles too! Follow this great tutorial from Born in '82 for a clever way to turn them into beautiful decorations. Super simple but so elegant and decorations you'll have for years!


Also, if you have old magazines or no idea what to do with the toy catalogues after you've finished writing your list to Santa, why not try making these gorgeous paper ornaments from them? A beautifully simple idea from Stephanie Lynn

And because we don't restrict ourselves to crafts here at Tiddlybobs, why not try your hand at creative baking and make a Santa bread?


How cool is that?? Love this idea from Taste of Home and hopefully will get a chance to try so keep your eyes peeled for that! 


Sock Garland Advent Calendar

As followers of this blog will already know, recently I was gifted with a beautiful, old Singer machine from my boyfriends grand aunt. I was super excited as so many crafting techniques and projects require sewing and I just don't have the time or patience to do it all by hand! However, my first attempt at using it didn't go too well. It ended with me crying on the bed while my boyfriend used a screwdriver to remove a clump of thread from the inside. I was defeated and scared and the beautiful old sewing machine was put back in it's case.

Luckily, it kept shouting from the end of the bed to be used and my favourite craft magazine, Homemaker Magazine, came with an easy sewing project for beginners that month so I plucked up the courage to try again. This time, the thread clumped again but I fixed it, read a bit more of my user booklet, adjusted the tension on the machine and away I went! I finished my first sewing project on my own machine! Huzzah! 


I was so happy that I immediately hopped onto Pinterest to see what my next project could be and then it hit me. An advent calendar. The one I made two years ago didn't have big enough pockets to hold the sweets and that really annoyed me so I decided a new advent calendar would be the best project. There were so many ideas to choose from but I loved all the garland based ones so much that I decided to do one in that style.

So out came the old Christmas tea towels (4 to be exact about it!)...


Out came some sock drawing skills, which I didn't know I had, to make my template. I first drew it on paper, added a 1cm border as  a seam allowance and cut it out. Then I glued it to some cardboard and cut it out to have a firm template to use on the tea towels. 


I then drew around the template 12 times on each tea towel making sure to turn the template every second time. This ensures that once all the socks are cut out, each pair will have the right side of the tea towel facing out when pinned together.


Once all the socks were cut out I had 48 single socks pinned into 24 pairs. Then it was time to sew.  Originally I was going to sew them on the wrong side and then turn them out but when I had them all cut I liked their size as they were so I decided to sew on the right side instead. Scarily, on my first sock, this happened...


But I just took a breath, ripped it out, adjusted my tension (as I learned previously!) and off I went. In no time I had 24 beautifully sewn socks. Thanks to the boyfriend I also, and a beautifully new pair of pinking shears so I used them to trim the edges. And yes my sewing wasn't perfect, so many of the borders became smaller than the others post pinking resulting in various sized socks but that's the joy of homemade right? Right guys?! .... Right?


I was then ready to hang my garland. I had bought some lovely red twine which I weaved in and out of the bannister on my stairs and then tied it in place. I had also bought the adorable pegs below - I know, for shame, I should have made them too but one step at a time guys!


I then pegged each sock to the twine, popped in the sweets and my beautiful advent calendar sock garland extravaganza was complete!


I can't express how happy I am with the finished result. I can't stop looking at it and smiling. Seriously, if you haven't made anything for your home for this Christmas yet do it now! I can't tell you how wonderful it feels to have something you made yourself hanging up and looking so beautiful.  I think I might finish this project crying on my bed too but this time they will be tears of joy. 

Yes. Crying over tea towel socks. I am still cool. 

It's the final countdown!!

This week I have started making my own advent calendar which will soon be revealed on this blog but in the meantime I thought I'd give you a few advent calendar ideas, in the form of this weeks Tiddlybits, so that you might be inspired to make your own. 


From the queen of all things crafty, Martha Stewart, comes this delightful matchbox advent calendar. Each day the matchbox is turned around to reveal a piece of a Christmas themed picture, in this case a Christmas tree but you could pick your own. You can also place sweets inside the boxes or perhaps rolled up pieces of paper with wishes or activities to do together on them. 


I love this box garland advent calendar from Crafts Unleashed. It's super easy to make and you can add your own flair by mixing up the colours and number design. You could also think about making the boxes yourself out of recycled toilet paper rolls.

As followers of this blog may know, I have discovered that there is nothing that you can't do with a recycled toilet roll and advent calendars are no exception. 


Take for example Morning Creativity's super charming advent calendar house made from toilet rolls covered with brown paper. I bet this is sooooo much fun to break into each day and see what's inside! I think I would paint the roof too or perhaps make it into a Christmas tree shape rather than a house.


You could also cover your toilet paper rolls in fabric or paper and make this great cracker themed advent calendar from Mindy Pitcher. This is the perfect one if you haven't got much space as you can hang it on the back of a door or the side of a bookshelf. 


Or how about making your toilet paper rolls completely unrecognisable and turning them into this gift box advent calendar from North Story? This is such a beautiful idea and the tutorial is fantastic so you have no excuse not to make it!


Finally, I love this gingerbread man garland from one of my favourite food blogs Honestly Yum and as I was putting this blog post together, I thought why not ice numbers on to the gingerbread man and each day you could eat one? So I'm putting that out there into the world and if you make it, I want day 24! 

I could go on and on as there are so many creative advent calendar ideas out there but please check out the Tiddlybobs Christmas Pinterest Board 'Snow is falling...' for some more ideas as well as many many more craft ideas for the holiday season. I will be updating it all the time so make sure you follow that board!

Thank you for reading and happy crafting!

Folding Frolics!

As you may have seen on Tiddlybobs already this week, I have been trying my hand at napkin folding and this got me wondering about what other crafts you can make using folding and TAH-DA this weeks Tiddlybits was born!


There are so many wonderful things you can make for your tables using napkins and soooo many tutorials available online in blogs and on YouTube. I loved this tutorial from One Good Thing by Jillee as it's a really sensible idea and can be used for every occasion; you can just theme it by changing what napkins you use! The simple ideas are always the best. 


Another great idea is to create beads from old scraps of paper or magazines that you have about the house. These beads can then be turned into necklaces or bracelets simply by stringing them together. You could even purchase earring clasps and make a unique and beautiful pair of earrings out of them. This tutorial from Cosmo Cricket is really in depth at showing you how the technique works and it's so easy, I'm not sure why I haven't done it before!


As the picture says, this tutorial from Peppermint Creative shows you how to make paper stars by folding (there is also glue involved but we don't mind that here!). It's a really pretty idea and with Christmas coming up it might be a great way to make a star for the top of your tree. 


Speaking of Christmas, how gorgeous are these folded Christmas trees? In this great tutorial from  The House that Lars Built these have been sprayed with gold paint and glitter but if you picked paper with a festive pattern, you wouldn't need to get the paint out at all! 


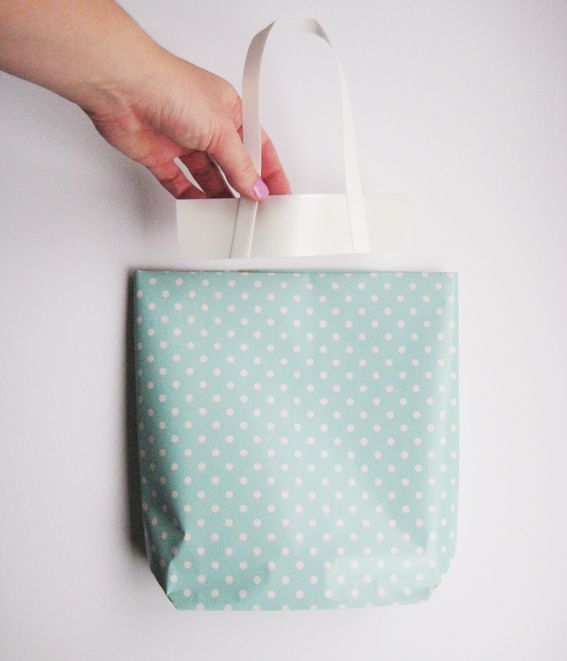
If you're thinking of Christmas and you think like me, then you're thinking of gift bags. This simple tutorial from Hello Sandwich is great for showing you how a bit of folding and some sellotape can create gorgeous gift bags. Don't forget that handles can be made from string and/or ribbon too!


Accordion books are definitely more complicated than just a bit of folding but still they are not impossible to make and are definitely well worth it. This tutorial from Design Sponge is the best I've come across on how to make one. They are a great away to create journals of specific events like your wedding or graduation. They can also be used as memento books. For example you could use it as a travel diary where you can stick photos, ticket stubs, diary entries etc. and you could even decorate the cover with a map of your trip.   

And finally, like last week I am going to end this weeks Tiddlybits with a video tutorial showing you how to wrap your presents in old shirts (or new ones that could form part of the gift!). But all of this  is really only the tip of the iceberg in folding crafts - please visit my Folding Fun Pinterest Board for even more inspiration.