Showing posts with label craft project. Show all posts

Boiled, Scrambled or Painted?

So we all know you can paint eggs and there are many people out there who have taken that to a whole new level and created masterpieces on shell BUT did you know you could do all this??


This fantastic Egg Totem Pole from Mr. P for example. A great decoration for a room or if you glue a piece of wood or a plate to the top you could create an awesome candle stand. 


We've all heard of message in a bottle but what about this? Surprise your Valentine by ditching the Hallmark card and sending a sweet message in an eggshell.  This great tutorial from Poppytalk shows you how with beautiful pictures.


Or why not vent some stress and anger by filling eggs with paint and throwing them at some canvas? Love this idea from Crystal Underwood on Growing a Jeweled Rose - soooo messy and fun and you have something to hang on your wall at the end! Brilliant!


Speaking of filling your eggshells with stuff - fill them with wax and create beautiful candles. You can leave the wax in the shell like these candles from Kidspot or you can peel the eggshell off and create egg shaped candles like those below from Andrea at Guide Central.


You can also use the technique to create the most awesome craft that I think is possible with eggs - JELLY SHAPED LIKE EGGS!! Yes that's right! JELLY!!!
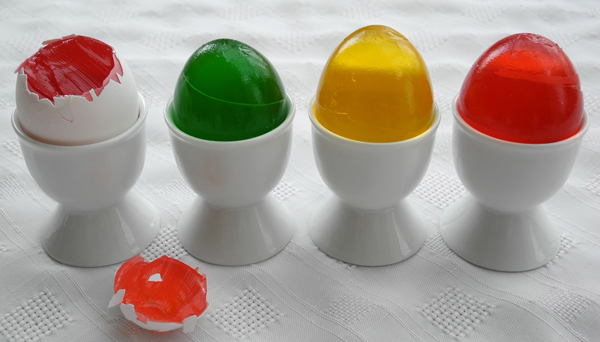

It's just amazing. And so joyful. Thanks to Steph at Oh Happy Day for creating and blogging about this. 

Have an Eggcellent time crafting!
(see what I did there!)

Deck the halls...

CHRISTMAS IS SO CLOSE!!!

Yes I may have already overdosed on sweets and Christmas films but there's still time to craft up some quick decorations before the real fun begins. This weeks Tiddlybits has some great ideas on projects for you to try and don't forget to visit the Pinterest board for lots more. 


First up is this gorgeous wall hanging from 20 North Ora. I'd love to make a wreath for my front door but I have no idea where to find the greenery and I can't afford the greenery or afford the base they need to go on so this wall hanging offers an awesome alternative. 


I tried this idea myself last year and I love it. It's such a great and easy way to add Christmas cheer to doors and cupboards. However, last year I didn't add a gift tag and think it's a brilliant idea so thanks to Liz on Call for that one! 


So, if like me, you've started the Christmas celebrations already, you may have some wine corks lying around the house. Instead of dumping them, why not turn them into colourful Christmas decorations that you can from year to year? This tutorial from Joy's Life is awesome and more importantly easy to do and for those of you with children, it's one that they can get involved with too. You could also use glue to sprinkle them with glitter too! 


And if, you've got wine corks then you must have wine bottles too! Follow this great tutorial from Born in '82 for a clever way to turn them into beautiful decorations. Super simple but so elegant and decorations you'll have for years!


Also, if you have old magazines or no idea what to do with the toy catalogues after you've finished writing your list to Santa, why not try making these gorgeous paper ornaments from them? A beautifully simple idea from Stephanie Lynn

And because we don't restrict ourselves to crafts here at Tiddlybobs, why not try your hand at creative baking and make a Santa bread?


How cool is that?? Love this idea from Taste of Home and hopefully will get a chance to try so keep your eyes peeled for that! 


Cut from a Different Cloth

It's that time of the year when the long sleeved t-shirts are coming out and the short sleeved t-shirt  is going away until next Summer or if it's seen better days, it's about to be thrown in the bin. But before you chuck it, stop and have a creative think. Maybe there's something else you could do with it?! And so in steps this weeks Tiddlybits with creative inspiration for all your t-shirt related crafty goodness!


The first thing you need to learn, before embarking on any t-shirt craft projects, is how to make yarn from a t-shirt. It's so versatile and easy to do too. This tutorial from Simply Crochet Mag explains how to make it and is super simple to follow. 


You can put your t-shirt yarn straight to work making these super pretty coasters with a vintage feel. The tutorial featured on Mom It Forward and is from Jenn at Endlessly Inspired - which is a blog I urge you to check out if you're looking for ideas for your next project. 


A more advanced project is to make a basket from t-shirt yarn using crochet. This great tutorial from Instructables will get you making tonnes of these in no time and as you get more confident you can upscale the methods to make bigger baskets!

Another great tutorial from these folks is this no-sew t-shirt bag. I'm a bit dubious about how much weight it could hold but definitely a cool idea and worth a try.


And speaking of no sewing, if you are not into all this yarn business how about you try this no sew pillow from Dream Book Design? It is so classy and easy to make - the perfect combination.


I hope that this weeks Tiddlybits has at least planted the seed of a creative idea in your brain but if not head over to my Pinterest board for lots more inspiration. 

Happy Crafting! 


Bump on a Glued Tin Can

Recently I have got a new desk and I have a load of different projects on the go at once so the need for good organisation is becoming vital. Last weeks Tiddlybits served to inspire you to get busy crafting with tin cans but it's ended up inspiring me to make something of my own. I decided to cover some tin cans in pretty paper and use them to hold all my pens and brushes so they're not cluttering up my desk.

I used the same tutorial as I used for my hair tie and bobby pin holder and even though this time there was less excess paper that needed to be hidden, there was a lot of bubbling of the paper! But progress is progress so hopefully it'll be third time lucky when I try this technique again. Meanwhile enjoy the pictures and please send me pictures of your tin can projects via twitter - @Tiddlybobs. 


Let her try and make a beehive out of me!

You may not be as evil as the Wicked Witch threatening to make a beehive out of your tin man but you can make many other wonderful things with them and this weeks Tiddlybits is all about just that!


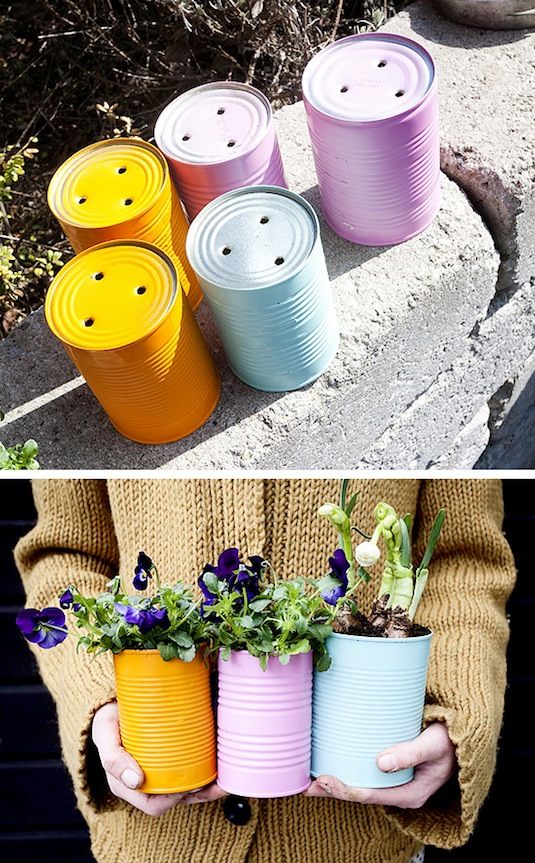
This gorgeous planters from Dos Family courtesy of their April Buddy Deer Dot are simply made by painting your tin cans and adding a few drainage holes with a drill in the bottom and voila! Beautiful, unique plant pots.


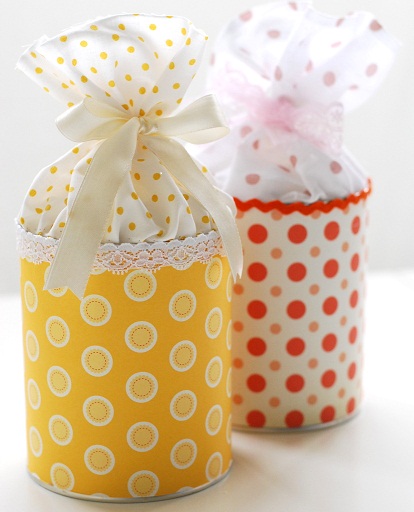
As you all know I am obsessed with gift wrap and I love this idea from BlingBling of using tin cans as wrapping for biscuits and sweet things. You can find the tutorial here. It's not in the english but the pictures are great so you should be able to follow it without much difficulty. 


This is a great idea from Design Sponge as part of their DIY Wednesday's for making a perpetual calendar from a tin can. You can also store your pens in it so it's perfect if you haven't got much desk space. 


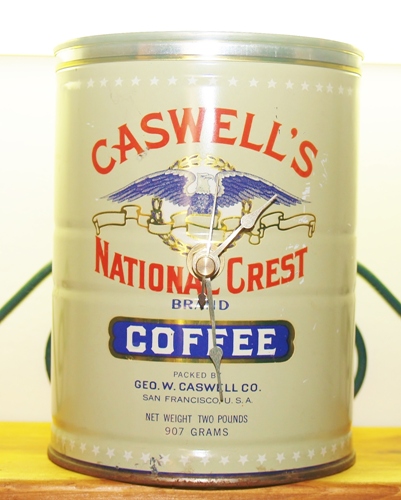
I love, love, love this idea of making a clock from an old tin can. So easy but absolutely brilliant result and I'm definitely making one of these for my desk. You can find the tutorial here on the Kelli's Kitchen blog. 


As we've not got long until the bad weather of Winter is upon us we need to grab a few more evenings in the garden before it's too late and what better way to set the mood then with these fabulous  tin can lanterns? And thanks to this brilliant tutorial from Grow Creative.

And if you're not satisfied with all of that, maybe you could try make your very own Tinman complete with a heart. 

Photo via Barbs Hackleton
For more tin can inspiration please visit my Pinterest board and happy crafting!


All the leaves are brown...

That familiar chill is back in the air, sensible shoes are walking the streets and cosy jumpers are back on the scene which can only mean one thing - Autumn is here. I love Autumn. In recent years it has definitely taken over as my favourite season. I get to go fruit picking and make delicious jams for tarts, I don't have to worry about my bits being out because they're all wrapped up in comfy tights and woolies again but more importantly the trees turn the most beautiful colours and it's hard not to be inspired by that! So this weeks Tiddlybits is all about things to make and do with those fabulous autumnal leaves that will soon be swimming around your feet.


These gorgeous napkin holders are from the Honest to Nod blog, the collaborative blog presented by The Land of Nod. They are super easy to make but the result is very expensive looking and will make having a ready meal for one a very elegant experience!


Who would I be if I didn't mention a way to use leaves in your gift wrapping? This is a great and super pretty idea from the equally great and super pretty Willowday blog.


A brilliant way to make your house feel all cosy on rainy autumn evenings is to make this lantern using fallen leaves. The tutorial from the Gingerbread Snowflakes blog is really well explained and easy to follow so we should all be able to make one of these.


These clay leaf bowls from Urban Comfort are stunning and would make a beautiful addition to your home. They would be great for holding earrings or soaps or any other delicate items that get lost if you just shove them in any old drawer!

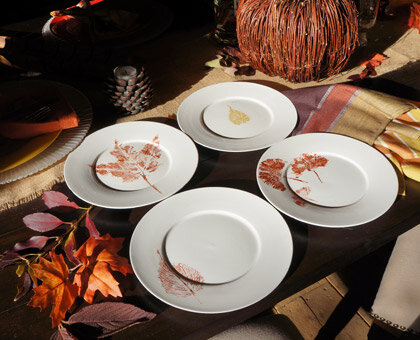
One of the easiest things to do with leaves that fall at this time of year is to paint the textured side of the leaf any colour and then press it down on paper or fabric and then slowly peel away leaving the imprint of the leave behind on the surface. It's really easy but can be used in so many different ways. Just check out these few below of you don't believe me!

Leaf Stamped Gift Wrap


Leaf Printed Plates

Leaf Printed Cushion

Leaf Print Tote Bag

I hope these links have given you a few ideas for what you can do with your Autumn leaves but if you feel you need some more inspiration please check out my Leave Craft Inspiration Board on Pinterest

Happy Crafting!

Remove the rings not the Caffeine!


One of the best things about working from home is that I can have a proper cup of tea whenever I want. Unfortunately hot drinks do leave rings and by the end of the day I can be left with an overwhelming sense of shame as I count how many rings I've drank that day! So instead of giving up drinking so much tea (which is madness!) I have decided to make myself some coasters.


I came across these gorgeous coasters on Pinterest and fell in love. They're very easy to make and you don't need many materials which is great for a girl with, currently, a very rudimentary craft box. 

You can find the full tutorial including a free PDF of the pattern on the  How About Orange blog which is currently resigned. Sad face. But all of Jessica's tutorials and downloads are still there for you to use. Happy face. 


The only change I made to the steps Jessica provided was that I stuck the pattern piece to a cereal box just because it made it easier to cut around as felt seems to stretch and move as you cut around a paper template even if you've pinned it down.


Also, because I only had black felt which doesn't show the design as well as the blue felt used in the tutorial, I stuck my coaster to a small piece of leftover white felt which I think gave it a nice finish. 

I really enjoyed making it, even though it was a bit fiddly at times, and I will make more but probably in different colours next time. 

Button Bonanza

So you may have sensed a theme this week since I launched my new logo and what better way to finish it off than with a button themed Tiddlybits?


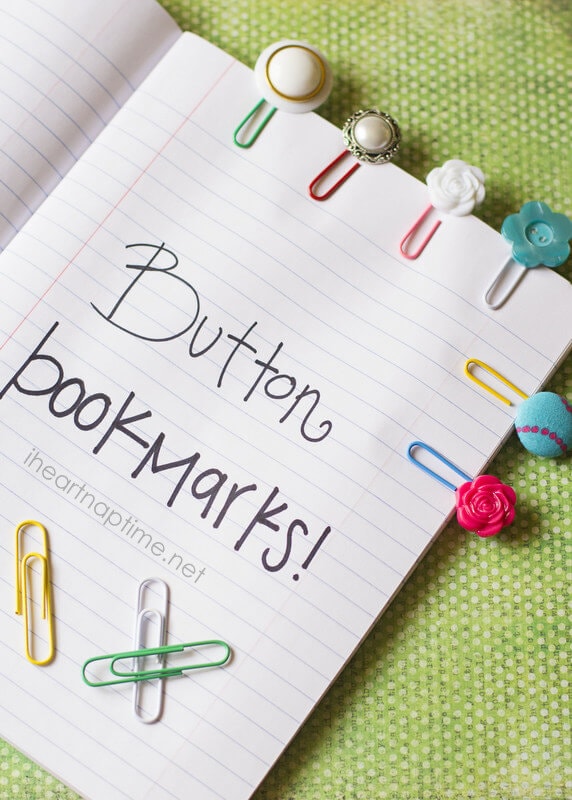
One of my biggest crimes is that I tend to dog ear pages when I'm reading a book. Not so much a problem when I'm reading my own books but definitely a problem when they belong to friends! I find big paper bookmarks quite cumbersome so these Button Bookmarks from iheartnaptime.net are perfect for me and super easy to make! 


Continuing the book theme these Matchbox Button Holders are genius plus holding them will make you feel like a giant! You can find the mini tutorial here including the link to the free printable book cover templates.

Another simple craft idea from Big Box Detox and their Tutorial Tuesday's is to turn your old buttons into fridge magnets for keeping your bills and other bits super organised and looking pretty even if you can't pay them! 


I also love this idea from Martha Stewart for making your napkins look super cute and chic. So simple but so elegant!


I am definitely going to make this Giant Glitter Button myself. I can't think of a better craft project for the Tiddlybobs office but it would be the perfect addition to any sewing/crafting house and a great one to get the kids involved in though maybe not the drilling! 

If all this isn't enough to inspire you to undertake a button themed project then please check out my Pinterest board for more button inspiration.