Showing posts with label tutorial. Show all posts

Bring it all back to you...

Recently I jumped on the bandwagon and watched the awesomeness that is Stranger Things on Netflix and it brought back so many memories of being young, watching The Goonies and ET for the first time and how fun hanging out with your friends for ten hours a day could be.

It made me miss all the cool things we used to have as kids and got me thinking about crafty ways of bringing the 90's back into my life....


I don't know about you but I loved trolls and had quite the collection. I also love biscuits. So this cookie cutter is perfect for bring them back into our lives in a very delicious way just like cookienan has done. 


Speaking of delicious things, I think we all remember the feel of soggy string on our wrists after biting our way around a candy necklace. Now we can be proper adults and use them as elegant napkin holders at our fancy schmancy dinner parties! Thanks to The Fairies Home for this idea. 


The many hours we wasted with one sheet of paper predicting our future love lives.... Nowadays paper fortune tellers are used as wedding favours, classroom tools and even in Cognitive Behavioural Therapy! Refresh yourself on how to make one and download your free template from Skip to my Lou


I had about 3 million sticker books and never did anything with them. This tutorial from FancyMade on making a sticker iPhone case is a great way of bringing both the 90's and stickers back into your life! 


Ah the feel of a feather pen on your cheek as you daydreamed about what jelly sandals you were going to buy.... Bring that feeling back and make your own fluffy pen with this great tutorial from Fashion Follower.


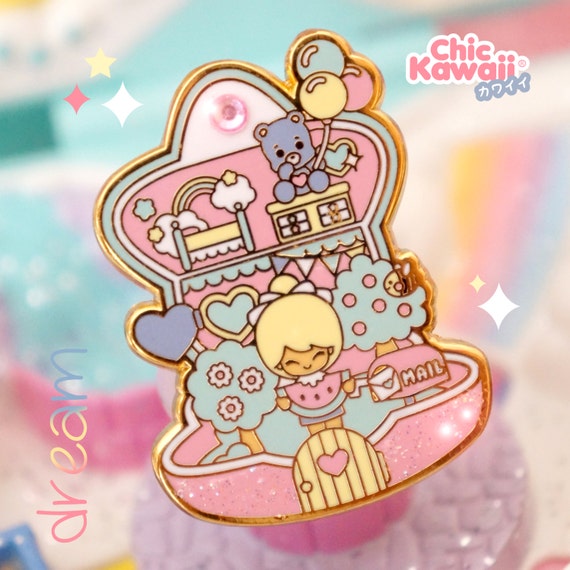
Bring back all the things you love about the 90's by sewing (or hot gluing if you're lazy) patches to your backpack. Wildflower and Company have super 90's inspired patches for you to choose from. Or maybe add some enamel pins? Chic Kawaii have some great ones like this awesome Polly Pocket one. 


And where would any of us be without the tattoo choker? Guess what? You can make you're own and it's soooo easy. Just follow this tutorial from Hello Whimsy

For more 90's inspired nostalgia please visit my Pinterest board here. Make sure you've got the Spice Girls blaring in the background first! 

How to make a pinhole camera

This morning all parts of the UK will experience a partial solar eclipse (the best since 1999 apparently!) but experts have been warning to not look directly at the sun when it happens so what should you do so that you don't miss this wonderful spectacle? Make a pinhole camera of course! 

What you need:


  • A Cereal Box
  • Tinfoil
  • A scissors
  • White paper
  • Sellotape
  • Something to make your hole 


Firstly, cut out a piece of white paper and sellotape it to the bottom of your cereal box. This will make it easier to see the projected image of the eclipse. 


Next, cut two slots either side of your cereal box and tape the middle together. 


Cover one of the slots with tinfoil. 


I then used a needle to poke a hole in my tinfoil but the size doesn't really matter so you can vary the size with anything you have to hand. 


And there you have it. All you have to do is bring your camera out and face your pinhole in the direction of the sun while you look into the box through the other opening - you should then see the projected image of the eclipse not he white paper. 

Unfortunately, for me, there were too many clouds so my pinhole camera never got used! All I saw was a cloudy sky change to a slightly darker cloudy sky! 


If you want to see what it would have looked out please check out this tutorial from Hilaroad which I followed to create mine. 

What to do when you've run out of Jam...

This week I attempted my first ever swiss roll and after three failed attempts I was successful - Hooray!

Look at that swirl!

But after so many attempts I was all out of jam and I wondered what sort of cool things could I make with a jam jar? And so this weeks Tiddlybits was born!


I think a lot of people made these Jam Jar glitter Globes in school but with Christmas just a round the corner maybe it's time to bring back this classic and now with your more grown-up taste add a bit of elegance to it like this beautiful one from Whimsical Wonderland Weddings. Plus if you've forgotten how to make them, there's a handy tutorial too.


There are plenty of ways to cover your jam jar lids, whether it be with paperpaint or using kids toys, and turning them into awesome storage jars but I particularly love this idea from One Bowl Parenting. I do a bit of embroidery and hand sewing so this pincushion lid and thread storage jar is  great for keeping all the little bits needed in one place, as they always find a way to get lost. It would make a great gift for anyone starting to sew. 


Speaking of storage ideas, these vintage string holders from Handmade Charlotte are a fantastic idea. You could also use them for ribbon storage too I guess. I love the way Charlotte lays out her tutorials with great pictures and a fun font, so I'm sure you'll have great fun following it and making your own. 


Another idea that I think is becoming very popular, particularly at weddings, is using jam jars as glasses. Why not go one step further with yours and etch a cute little message on them? It's super easy and super chic. I recommend this tutorial from You Seriously Made That? if you're going to try it. 

And finally, a bit different for Tiddlybits but this week I decided to end on a video. Video tutorials can be invaluable especially when you a re trying something for the first time and there is pretty much a video for every skill you could possibly want to learn. This weeks video shows just how simple and cheap crafting can be, so you've no excuses not to get started! :) 


May the craft be with you

It is no secret that I am a huge Harry Potter fan and all round lover of things classed as "nerdy" so what better theme for this weeks Tiddlybits than Nerd Crafts?!


It's often the simplest ideas that are the best and this tutorial from Dream a Little Bigger showing how to turn a Kleenex box into a piece of lego is genius!

Speaking of simply genius ideas why not turn your plant pots into your favourite superhero? Like Batman for instance (totally doing this!).  Thanks to Jan Tracy for pinning!


The ultimate dream for any Harry Potter fan is to own a real wand but alas that can not be. Console yourself by making yourself a fake but awesome one by following this tutorial from Please Give Peas a Chance


Or if you haven't got a glue gun to hand why not take out your scraps of paper and get quilling. You could make beautiful art like Ironman below or one of your favourite Sci-fi/fantasy characters. You can find more inspiration from The Mary Sue here.


Or if that seems too complicated, then follow the lead of Anthony Herrera Designs and download any one of these PDF patterns and make awesome Star Wars snowflakes for fantastic and unique Christmas decorations. 


I hope that's inspired you to get geeky with your crafts but if not head over to the Pinterest board where there are loads more ideas including creating jewellery from old remote controls and Lord of the Rings door hangers.

Don't count your chickens....

This weeks Tiddlybits carries on with the tradition of using things from around your house. This time it's egg cartons. I eat a LOT of eggs so now it's about time I stopped adding to the giant human waste pile and get creative with my egg cartons. Below are all the projects that are inspiring me, particularly the mirror, and as always you can find more great ideas on the Pinterest Board.


This is so beautiful and expensive looking that I still can't believe it's made from egg cartons. I found the tutorial on Better Homes and Gardens craft page. You could play around with different colours and if you don't have a mirror, you could use it around your picture frames.


I love this idea for an egg cup from Red Ted Art which is such a funny little idea for reusing your egg cartons. Might even think about making a duck one for your duck eggs!


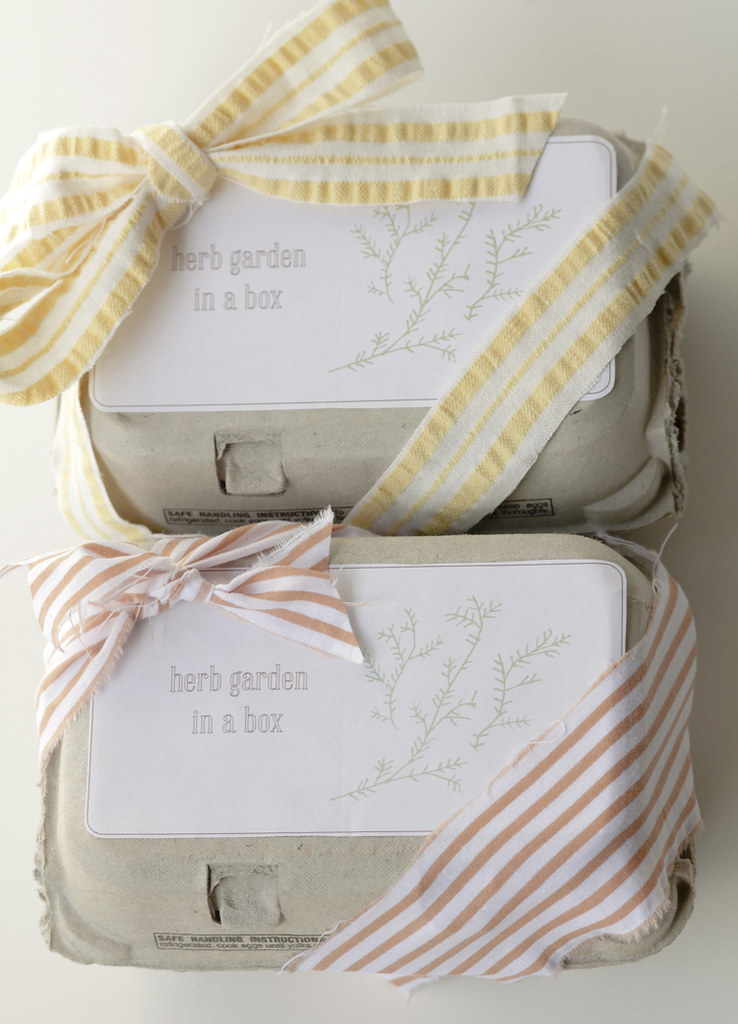
This is a great gift idea of a herb garden in a box from Randi of Swoon. Easy to do and a gift that someone could have and use for years after you give it to them. I also love how she's packaged the gift. Who would have thought an egg carton could look so pretty?


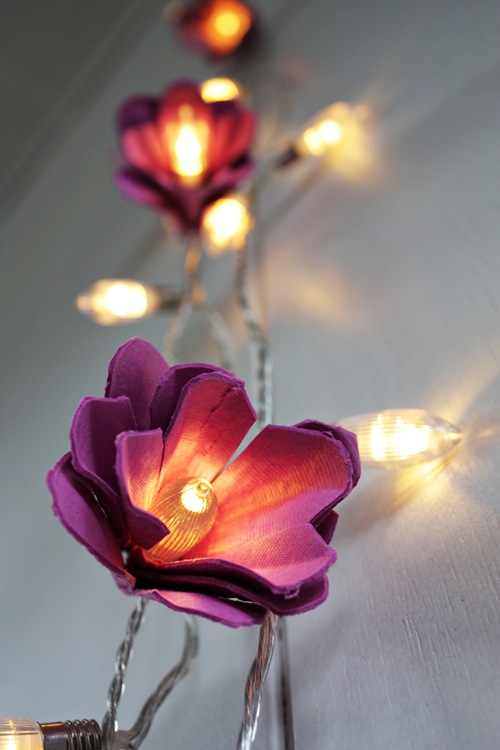
I love these fairy light covers and that they completely don't look like they are made from an egg carton. Great idea for a gift too! The tutorial is not in english but the photos are pretty self explanatory. 

I hope these ideas have given you some inspiration and get the brain cogs turning. As usual please send me pics of any projects you try via tiddlybobs@gmail.com or twitter @Tiddlybobs and I'll feature them on the blog.


Cut from a Different Cloth

It's that time of the year when the long sleeved t-shirts are coming out and the short sleeved t-shirt  is going away until next Summer or if it's seen better days, it's about to be thrown in the bin. But before you chuck it, stop and have a creative think. Maybe there's something else you could do with it?! And so in steps this weeks Tiddlybits with creative inspiration for all your t-shirt related crafty goodness!


The first thing you need to learn, before embarking on any t-shirt craft projects, is how to make yarn from a t-shirt. It's so versatile and easy to do too. This tutorial from Simply Crochet Mag explains how to make it and is super simple to follow. 


You can put your t-shirt yarn straight to work making these super pretty coasters with a vintage feel. The tutorial featured on Mom It Forward and is from Jenn at Endlessly Inspired - which is a blog I urge you to check out if you're looking for ideas for your next project. 


A more advanced project is to make a basket from t-shirt yarn using crochet. This great tutorial from Instructables will get you making tonnes of these in no time and as you get more confident you can upscale the methods to make bigger baskets!

Another great tutorial from these folks is this no-sew t-shirt bag. I'm a bit dubious about how much weight it could hold but definitely a cool idea and worth a try.


And speaking of no sewing, if you are not into all this yarn business how about you try this no sew pillow from Dream Book Design? It is so classy and easy to make - the perfect combination.


I hope that this weeks Tiddlybits has at least planted the seed of a creative idea in your brain but if not head over to my Pinterest board for lots more inspiration. 

Happy Crafting! 


Button Bonanza

So you may have sensed a theme this week since I launched my new logo and what better way to finish it off than with a button themed Tiddlybits?


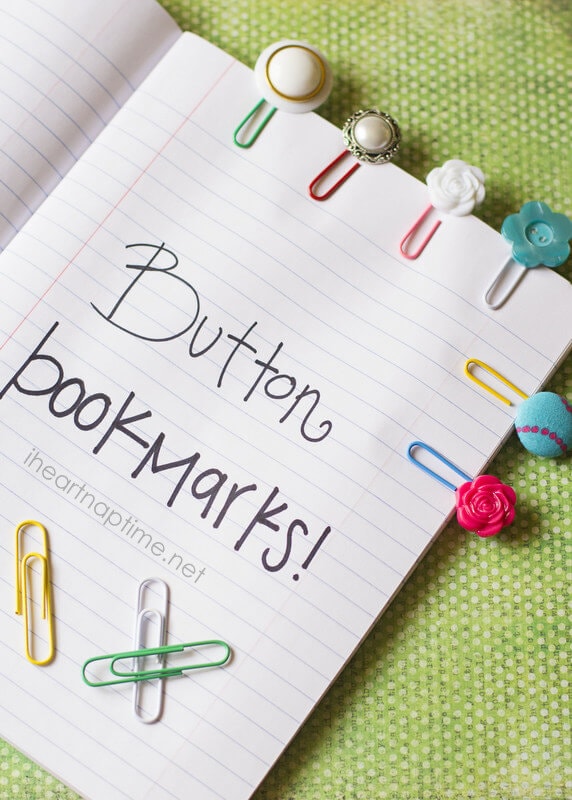
One of my biggest crimes is that I tend to dog ear pages when I'm reading a book. Not so much a problem when I'm reading my own books but definitely a problem when they belong to friends! I find big paper bookmarks quite cumbersome so these Button Bookmarks from iheartnaptime.net are perfect for me and super easy to make! 


Continuing the book theme these Matchbox Button Holders are genius plus holding them will make you feel like a giant! You can find the mini tutorial here including the link to the free printable book cover templates.

Another simple craft idea from Big Box Detox and their Tutorial Tuesday's is to turn your old buttons into fridge magnets for keeping your bills and other bits super organised and looking pretty even if you can't pay them! 


I also love this idea from Martha Stewart for making your napkins look super cute and chic. So simple but so elegant!


I am definitely going to make this Giant Glitter Button myself. I can't think of a better craft project for the Tiddlybobs office but it would be the perfect addition to any sewing/crafting house and a great one to get the kids involved in though maybe not the drilling! 

If all this isn't enough to inspire you to undertake a button themed project then please check out my Pinterest board for more button inspiration.