Crafty fun times!

Well it's been a crafty week this week! First off I had to make some props for a drama club show. Well I didn't have to, I chose to! I facilitate a drama club for 5-6 year olds once a week and at the end of each term we do a little showing for the parents. This term it was all about space so the kids performed a short poem all about the planets in our solar system. 


I printed colouring book sheets of each of the planets from twistednoodle.com and gave them to the kids to colour in. I then took them away, cut them out and using masking tape to attach them to wooden skewers. 


This week I also made my first attempt at paper cutting and made a Secret Garden bookmark. I cut the shape of the keyhole out in white card and stuck it on top of flowery paper to give the illusion of a garden through the keyhole. 


I then stuck more white card on the back and added a purple ribbon. I didn't like the finished product as the keyhole is not as symmetrical as I would have like so I'll use a stencil next time! I also didn't think the paper did what I wanted it to so I'll draw the garden behind next time I think! 

I also finished a project I've been working on since the New Year but I'll tell you more about that one after Easter! 

How to make a pinhole camera

This morning all parts of the UK will experience a partial solar eclipse (the best since 1999 apparently!) but experts have been warning to not look directly at the sun when it happens so what should you do so that you don't miss this wonderful spectacle? Make a pinhole camera of course! 

What you need:


  • A Cereal Box
  • Tinfoil
  • A scissors
  • White paper
  • Sellotape
  • Something to make your hole 


Firstly, cut out a piece of white paper and sellotape it to the bottom of your cereal box. This will make it easier to see the projected image of the eclipse. 


Next, cut two slots either side of your cereal box and tape the middle together. 


Cover one of the slots with tinfoil. 


I then used a needle to poke a hole in my tinfoil but the size doesn't really matter so you can vary the size with anything you have to hand. 


And there you have it. All you have to do is bring your camera out and face your pinhole in the direction of the sun while you look into the box through the other opening - you should then see the projected image of the eclipse not he white paper. 

Unfortunately, for me, there were too many clouds so my pinhole camera never got used! All I saw was a cloudy sky change to a slightly darker cloudy sky! 


If you want to see what it would have looked out please check out this tutorial from Hilaroad which I followed to create mine. 

Kiss me I'm Irish

As we all know the day when people all over the world celebrate the fact that Irish people are the best  as an excuse to get very drunk, tell some stories and have a dance, is fast approaching. I always seem to end up working or involved in something that prevents me from celebrating and this year is no different but if, unlike me, you are more prepared and have booked the day off then here are a few more ideas on how you can make it even more fun!


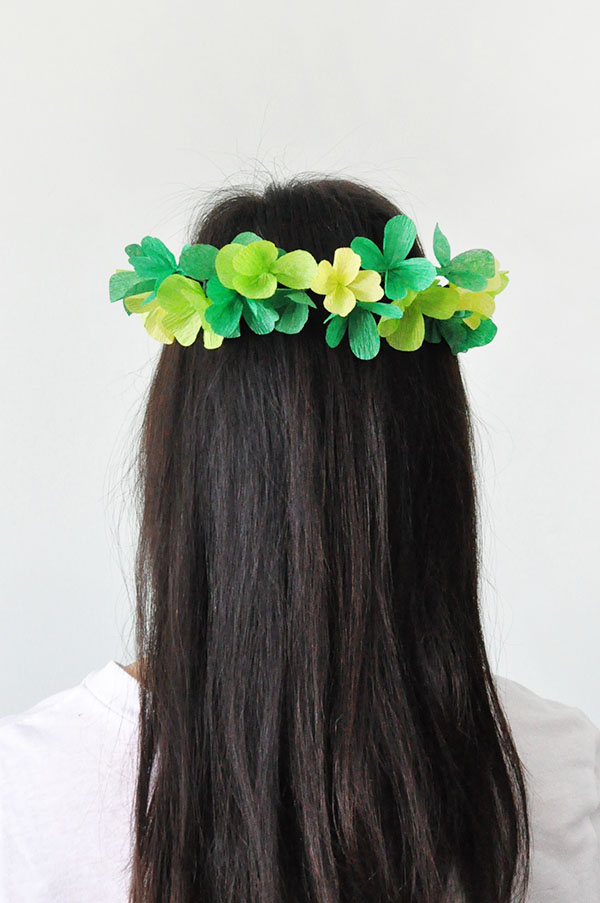
Well, first of all, you have to be looking your best for the parade! Sure the whole town will be out!  This awesome clover crown from one of my favourite sites Oh Happy Day will make sure you're looking your best as well as sticking with the theme. 


Once you've got your look sorted then you'll need to focus on your luck! You'll need a lot to get you through this marathon of a day so why not make these bags of gold created by Patti from Celebrations? They are super cute and include chocolate so I don't see what's not to love. 


Now that we've got those out of the way, on to the important stuff - the drink. These edible cups from  Lovely Indeed mean that, not only are you getting a taste of the Irish fuel but, by eating them, they're also providing the necessary soakage so that you can carry on drinking. A full proof plan. 


And you can make your drink even more festive by making these Shamrock Straw toppers; another awesome  project from Martha Stewart. 


And if you're stuck no what you should drink, try out some of these cocktails - all Irish themed, obviously. Cocktail making is craft to learn all in itself so you'd be killing two birds with one stone. 


And when you've had enough to drink and start seeing tiny men then this leprechaun trap from Lia Griffith will be just what you need so set it up before you go out! 

If none of these ideas tickle your fancy then head over to the Tiddlybob's Pinterest board where there are lots more. 

Happy St. Patricks Day!!

Interview with Scribble and Sew

Recently I came across a lovely business on Twitter called Scribble and Sew where children's drawings, paintings or doodles are turned into embroidered works of art as keepsakes, gifts or just to hang on your wall. They were running a competition to win a free commission and I entered and won!!! 


Amy, who runs the business, was super lovely to work with and super quick! Over the course of only a few days we and gone from agreeing the design to the beautiful piece landing on my doorstep. The piece was of a picture my niece had drawn. She had been bird-watching when I was visiting, and inspired by my illustrator boyfriend, decided to draw pictures of all the birds she was looking at. I thought that this drawing was the perfect project for Amy from Scribble and Sew to work on. She loved the idea and thought it would be great to put the birds in a tree too. Below is the drawing and the finished product - isn't it awesome?!


I loved Amy's work so much, I decided to find out more and interviewed her for Tiddlybobs! 

Amy is the owner of Scribble and Sew. She is almost 30 and has been married for seven years. As well as being a step mum she has two cats called Pickle and Pumpkin (cute or what?).

Amy, what inspired you to start Scribble and Sew? 

My Nan and Mum both taught me to sew starting with cross stitch samplers,  I have my first completed one, a home sweet home sampler by my front door. I always try to make or sew something for friends birthdays & christmas. It wasn't until, sadly in 2013, I lost both my Nan and Mum that it forced me to re-evaluate certain things and start focusing on doing more for myself and that is when Scribble & Sew went from a hobby to a little business.


What's a typical day for you when you're working on a new project?

Well I work full time so I fit my project's in whenever I can. It's brilliant that you can take it everywhere with you, on lunch breaks, while my daughter is at her gymnastics lessons, when I get in from work. My favorite time to embroider is with a big cup of tea and with Murder She Wrote on the telly, I'm a smidge obsessed with Angela Lansbury (I have her portrait tattooed on my leg!)

You create your wonderful designs using embroidery. What are your top tips for someone just beginning to use this technique?

My top tips...It may seem obvious but practice and lots of patience. It can take along time to produce a finished hoop. I would say to start simple just using back stitch to create solid lines then when you are comfortable with your stitch length you can move on to slightly more complicated stitches such as split stitch which is what I favour. There are such wonderful tutorials online and don't be afraid, you can always unpick.


Which has been your favorite project?

This is a relatively new venture for me and it came about from little embroidering portraits of wrestlers for my husband. I just thought it was a lovely way to show your child's work other than on the fridge And also I thought they would make lovely mothers day presents of for grandparents. I have two favorite pieces so far - they are a brilliant little rocket and some very cute little birds that needed a home, so I placed them in a tree.


What is the best and worst thing about running your own creative business?

The best thing about running my own creative business is being able to do something that I truly love doing and being able to create unique pieces that mean so much to the lovely people who ask for commissions.

And the bad? Hmmm, well I don't think it is necessarily a bad thing but not being able to run Scribble & Sew as my full time job - perhaps a little way down the road this might happen... fingers crossed.

I love running Scribble and Sew and it makes me ever so happy not just that I get to sew everyday but because I get to create wonderful keep sakes for lovely people. Children have a fantastic view of the world and I feel very humble to be asked to capture these little moments with a craft I enjoy. 


If you want to find out more about Scribble and Sew or if you think a custom piece would be the perfect Mothers Day gift then visit Scribble and Sew on Twitter or Instagram. 

If I only had a heart...

Valentines Day is just a round the corner Tiddlybobbers and it's a bit like marmite - people either love it or hate it! I, for one, love it! I think it's great to have a day to celebrate love and happiness but I do wish there was more of a focus on all kinds of love and not just the romantic kind. So, this year, try and tell your friends, family members and pets how much you love them too and let's celebrate love in all it's forms!! In fact I'm so excited I want to make everything heart shaped!! Below are a few ideas if you want to too!


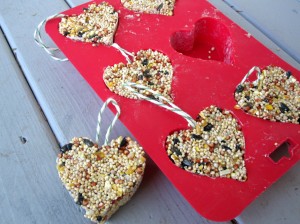
How about letting nature know how much you love her by making these awesome heart-shaped bird feeders created by Alison at No Time For Flashcards? Birds will appreciate it and you'll get to wile away the Valentines day hours bird-watching - sounds like bliss!


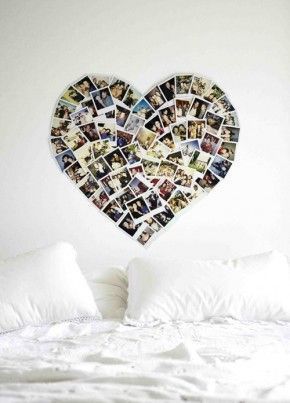
But if looking at nature is not your thing, what about looking at some photographs? You could create a photo collage in a heart shape of all the people you love. I particularly love the overlapping design above from Hadley at Huffington Post as part of another inspirational list blog. 


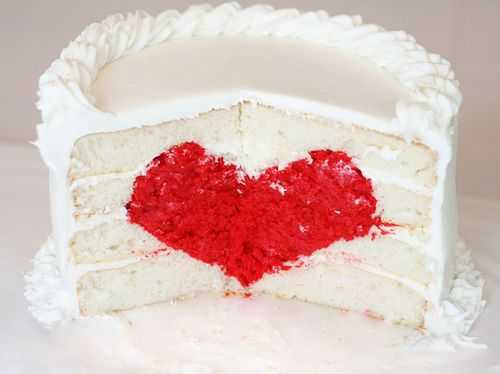
Or why not invite all those people you love over for some cake and surprise them with a secret hidden heart! A brilliant creative bake recipe from I am Baker and one that definitely must be tried out!


And what is cake without a cup of tea? Try making these genius heart-shaped teabags courtesy of Her Imajination. It's a great tutorial - very easy to follow and beautiful pictures. 


And if there's something I love more than tea then it's books! This heart shaped bookmark is perfect  for those gorgeous times when you get to curl up with a great book and travel to your favourite far off world. This video tutorial below is from Lindsay at Craft Foxes and shows you how to make them. 


I hope you have a wonderful Valentines Day celebrating love in all it's forms even your love of crafting! 

Boiled, Scrambled or Painted?

So we all know you can paint eggs and there are many people out there who have taken that to a whole new level and created masterpieces on shell BUT did you know you could do all this??


This fantastic Egg Totem Pole from Mr. P for example. A great decoration for a room or if you glue a piece of wood or a plate to the top you could create an awesome candle stand. 

We've all heard of message in a bottle but what about this? Surprise your Valentine by ditching the Hallmark card and sending a sweet message in an eggshell.  This great tutorial from Poppytalk shows you how with beautiful pictures.


Or why not vent some stress and anger by filling eggs with paint and throwing them at some canvas? Love this idea from Crystal Underwood on Growing a Jeweled Rose - soooo messy and fun and you have something to hang on your wall at the end! Brilliant!


Speaking of filling your eggshells with stuff - fill them with wax and create beautiful candles. You can leave the wax in the shell like these candles from Kidspot or you can peel the eggshell off and create egg shaped candles like those below from Andrea at Guide Central.


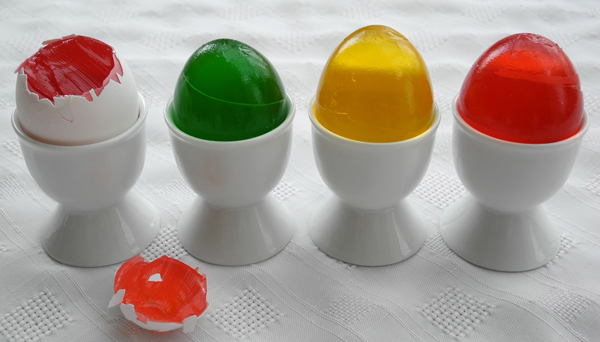
You can also use the technique to create the most awesome craft that I think is possible with eggs - JELLY SHAPED LIKE EGGS!! Yes that's right! JELLY!!!


It's just amazing. And so joyful. Thanks to Steph at Oh Happy Day for creating and blogging about this. 

Have an Eggcellent time crafting!
(see what I did there!)

Give it socks!

So my New Year, New Skills resolution carries on with Cross Stitch this week. One of my good friends has recently put up pictures on Facebook of her beautiful and hilarious cross-stitch work so it inspired me to take up the needle and get started.

I found a cross-stitch iPhone over project in a local shop and thought it would be a great place to start. The first problem I ran into was separating floss. It's a nightmare. Knots and tangles everywhere!!


But I found this great video on YouTube and though I still had some tangles, it definitely wasn't half as bad. 

The other problem was planning my design. I started just stitching without properly counting the squares and so kept running out of space and having to pull everything and start again! My own fault but definitely make sure you plan before you start. 


And once you've figured out those two things, it really is great fun. You can use whatever colours you like and there are no limit to the designs you can do. I settled on the motivational Irish phrase of "Give it Socks" with two patched socks to inspire me on days when I'm feeling demotivated. 


Say Cheese!

I live in rented accommodation and currently I'm trying to figure out little ways to make our space feel like our own. I think one of the best ways to make a room more personal is by adding photographs to it. Unfortunately hanging photo frames often means holes in the walls which equals an angry landlord so I've been looking up alternative ways to display our photographs. 


Most people now have a set of chunky letters in their house so I love this idea from Petia Mitchell on Shutterfly to use them as a way to display photographs. You could also add old ticket stubs or other mementos to make them even more personal. 


Turning photographs into dancing cut-outs is such a brilliant and silly idea! It's great! Here's the tutorial from Sweet Paul and I love the suggestion of adding magnets to the back so you can stick them to your fridge. 


Speaking of magnets, this tutorial from Sundaesins is a gorgeous and cute way to turn your pictures into magnets. I like how she added a polaroid photo border to each but you could use borders of different colours and shapes to your liking instead and to give a bit of variety. 


Tonia on eHow made this awesome photo jigsaw as a fathers day present but you could just make one to keep on your coffee table and maybe put a different photo on each side of the cubes so you can have six different jigsaws. You could even just display the jigsaw in it's box on a bookshelf or mantelpiece. 


You could also follow this tutorial from A Beautiful Mess and learn how to transfer photographs to fabric. You could then add your photographs to cushions and blankets to make the ultimate personal soft furnishings and your landlord can say nothing about it!

I would also recommend getting some blender pens so you can add photographs easily to your journals like FP Jana has done here or display lots of photos at once by creating some collages from your digital photographs and then display the collages instead  - Pic Monkey is a great site to do this and helped me create the photo strip below.  Now I've just got to make a decision on which way to display it. 


I hope this has inspired you to get creative with your photographs and add an an extra personal touch to your home. I'd love to see pictures of your projects so feel free to comment or tweet me @Tiddlybobs.

If the key fits...

Unfortunately this week our house was broken into so a change in locks was necessary. With this brought a new house key but it also left me pondering about what to do with the old key. Leave it in a drawer to get lost forever or is there something more interesting I could do with it?

So off I popped to Pinterest and what an awesome collection of craft project ideas I found including an amazing organisation...


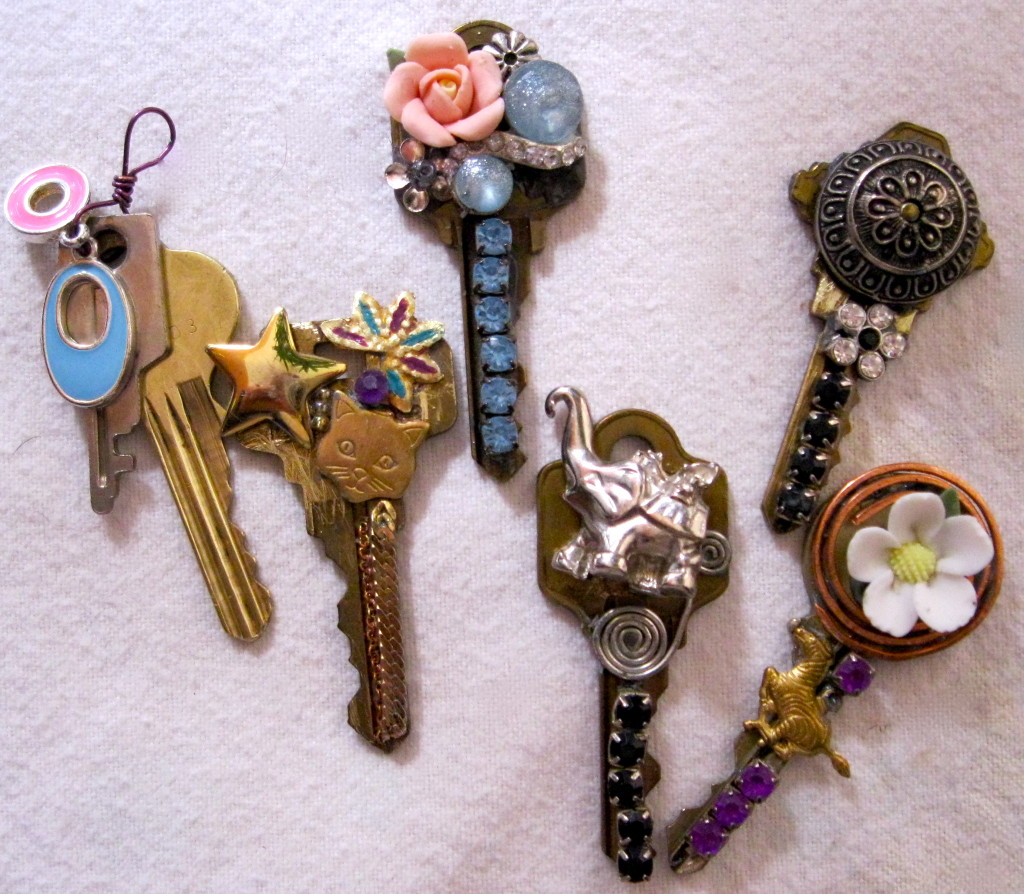
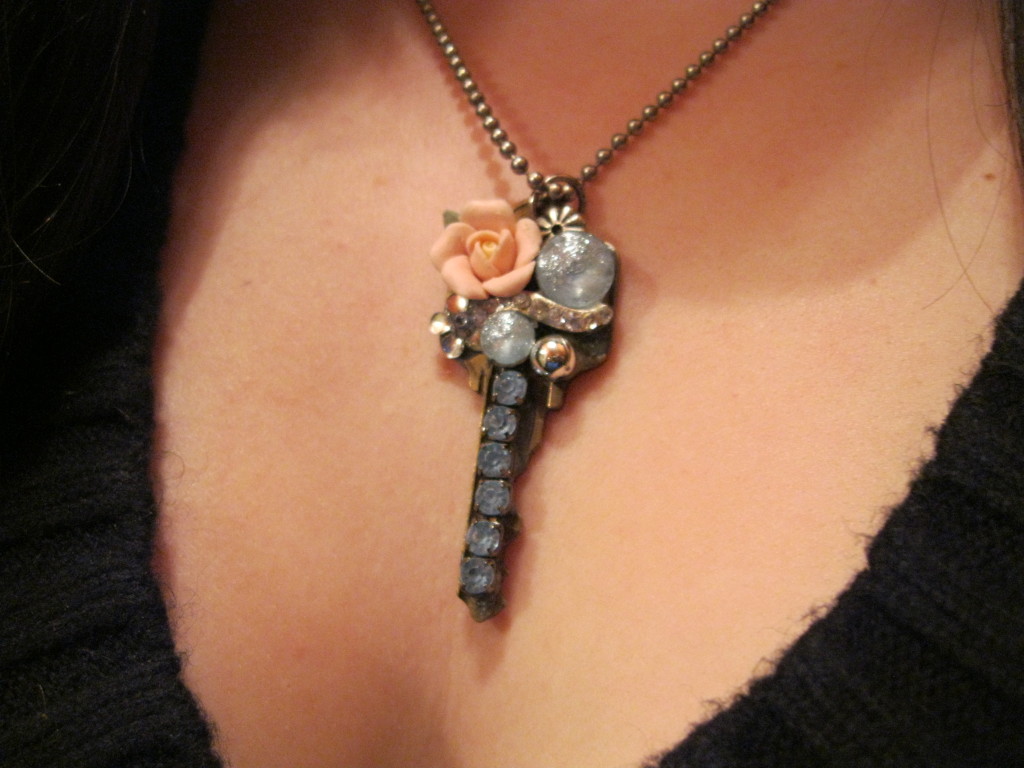
First up and the most common idea is to turn old keys into necklaces, earrings or badges. You just need some old bits and bobs and some glue and a chain to string through the hole in the key. It's super easy but looks very cool.


The pictures above are from the lovely ladies at The Green Divas who take you through making your own jewellery here too so you can never get lost! 


Another popular idea was making windchimes. There are many different styles and types - a few of which are on my Pinterest board. I think it's probably best to let your imagination go wild and work with the materials you have at home to make a really unique piece (and save on cost!) but if you are looking for direction you can find the tutorial for the windchime shown in the picture on the awesome Urban Threads blog.


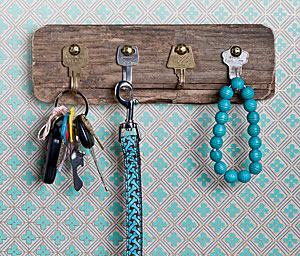
I love this idea from Wendy on Sierra of turning old keys into a key rack as it completes the life cycle of a key perfectly and as we know from The Lion King the circle of life moves us all!! The tutorial is great and can be found in slideshow form here.


The final project is called The Giving Keys. These are repurposed keys with inspirational words carved into them. They are given to a person when it's felt they most need it and the person keeps it until they meet someone else they think needs that word in their lives. It's a beautiful project and it exists to employ those transitioning out of homelessness so it's for a great cause also. I urge you to get involved if you can.